Image Overlay using Adobe Photoshop
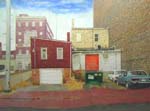
What we would like to do is marry these two images together.


To make this effect for a web page.

So first I asked myself, "About how big do I want the resulting image?" So I decided about 3-4 inches.
So, I created a new file about 300 pixels.
Goto File
Goto New

Click ok and you should see something like this:

This will be your main canvas for the final image.
Now, We have to resample down those two images that are linked above.
So, we are going to open both images in photoshop by:
Goto File
Goto Open
Point to those images are your hard disk. (I saved mine straight from the web site to my desktop) and Open them.
You should have something like this:

Now, If you remember back, we made our original Canvas 300px. Well, we need both of these large images to fit inside
this canvas so I decided that both of them had to be at least 150px. Since we are overlapping them, we could actually
make them larger but we'll stick to 150px and leave the minor details to you.
So, for both images we are going to :
Goto Image
Goto Image Size...
From there you should see :

What we are going to do on this dialog is put in 150px in the width section.
Take special note that you make sure that Constrain Porportions is selected here. Else
it will resize the width, but not the height, which will make your image look funky.
If you have gotten this far without troubles, congrads ! We are almost done. Take a breather / inhaler and
lets crank this thing out.
Ok, We should now see something like this:

A couple smaller images and still of course our faithful canvas.
Now, here is really where the action happens. For both of the smaller images we are going to
select everything in the visibile area by holding down ctrl and then pressing the 'a' key. An
alternative to this is to just :
Goto Select
Goto All
So when selecting everything for each of these images we should see something like this:

Notice the little dotted border around the image. This indicates you are doing it right.
Now, you are going to copy the contents of each image by hitting the ctrl and then pressing the 'c' key
this is a copy command. An alternative you can:
Goto Edit
Goto Copy
Click on our Canvas that we are going to have the resulting image and press and hold down the ctrl key and then press 'v'
We are doing a paste command. An alternative for this is to :
Goto Edit
Goto Paste
You should see something like this:

Now, I want you to take some special interest in this area of Photoshop. Please Look for this area:
It should be on the right and towards the middle to the bottom of Adobe Photoshop

This here is the layers section of when you are creating images. Every image that you are working with
is on what Adobe calls a "layer". You will see the power of this as we move on.
Now, we are going to do the same thing to the other image. You should see this:

Looks weird and you really don't want that. this is ok, we are doing the right thing.
Now, Take a look at the layer section again : You should see this:

Take some time to take a look at your tool box for a second. Make sure that you have this selected in your toolbox:

Now I want you to click and hold down anywhere on our canvas and start moving your mouse. You should see one of your images move !

Now, this is the remnants of getting the effect that we are looking for. Place that image about where you think you would like
that image. Now, I would like you to select the other layer (Layer 1) in the layers area do do the same thing with moving the image
around. You should have something similar to the effect that I have posted above. BUT, you may ask, "Well I want the other image on
top of the other one." Goto our layers section and click and drag layer 1 above layer 2. Now, your image should be on top of the
other one. Resulting into something similar to this:

Congradulations on your quest ! I hope that you have learned some fundamentals on this topic but as well, attempted to struggle to find
somethings that I was talking about. Spending some time to find things sometimes leads you to discover other neat things along the way.
At this point I would like to thank Larry Snode for allowing me to use some of my favorite artwork of his to create this little
tutorial / How-to. If you would like to purchase or gaze at any of Larry Snode's artwork goto :
His web Site here.


